
If you’re into digital art designs, you would know how valuable Procreate is already. This is one of the best apps as far as digital art designs are concerned. Various people are interested in getting into digital art designs but don’t have a clue about how to get going with things. Practising illustration skills would never be better when you use Procreate for the purpose. If you’re using an iPad, you would want to know how to use Procreate on iPad.

Table of Contents
Using Procreate on iPad – What do you need?
The iPhone version of procreating is meant for beginners. More often than not, iPad users would use Procreate if they want to work on their digital art designs as a profession. With the help of Apple Pencil, you can use it smoothly on iPad pro too. Let’s take a look at some of the key aspects that will help you to know how to use Procreate on iPad:
1. Equipment
These are some of the key elements that will help you to use Procreate on iPad. First and foremost, you will have to buy an iPad. We assume that you have bought that already and that’s the reason why you have reached out here. The next thing that you would require is an Apple Pencil. The last thing is to install Procreate on your device. As long as you have all these three things with you, you will learn to use the application slowly and steadily.
Although there are only three elements required here, all these elements can prove to be quite expensive. Procreate is available only for iOS so you wouldn’t be able to use it on any other platform.
2. Different File Types
Now that you have got three important things to know about how to use Procreate on iPad, you should know about different file types that will be important here. When you first start drawing something on Procreate, you will be given an option to choose the size and resolution of the picture. Since you have just gotten introduced to this application, it would be better to choose the custom resolution or a preset size.
As you get to know more about the application and how to draw digital arts on it, you can start choosing your size accordingly. The file size and DPI would play a huge role in the maximum layers of the canvas. If you want to settle with digital artwork, you can use RGB as the colour profile. But if you would like to print the digital artwork, you should use CMYK. This is the setting of most of the printers so you should always choose this colour profile when you would like to print your artwork.
You also have a feature of time-lapse video. This video showcases all the digital works that you create on this platform. You can make changes to its quality and size as well. In case you would like to stick to the normal quality, you don’t have to make the changes. But if you want to edit the quality in any way, you’re always welcome to do so on this platform.
3. Touch Actions
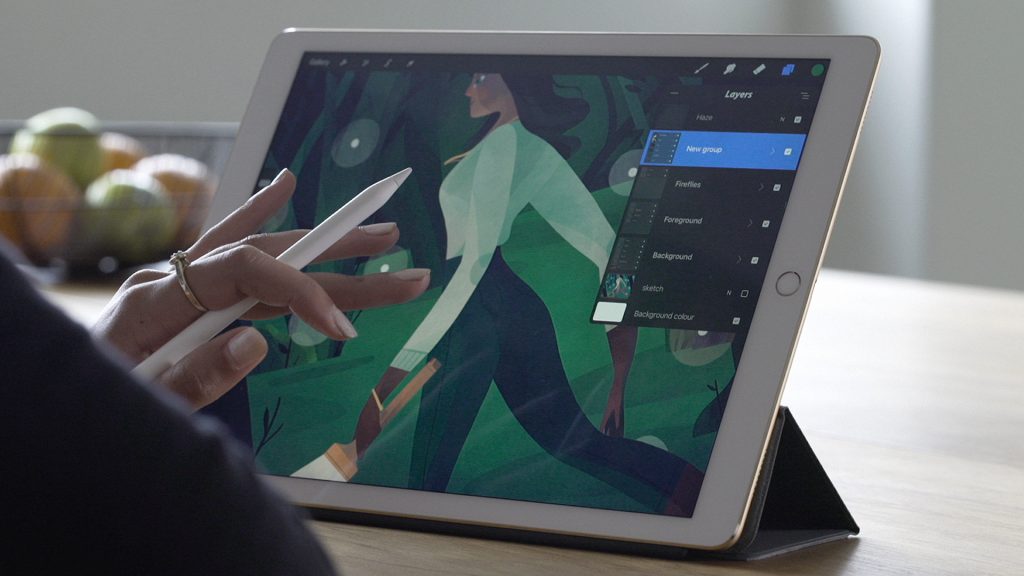
One of the key aspects to look forward to understanding how to use Procreate on iPad is to edit the touch Actions. In case you have got an Apple Pencil, you wouldn’t want to use anything else to make your drawings. You always have an option to draw with your hand but is it going to be any good drawing things with your fingers on your iPad? You will always find an Apple pencil to be a far better option.
While you’re using an Apple pencil to do the task, it is still recognising the touch of your fingers. So when you’re making your digital artwork, it is going to interrupt your drawing badly. You would want to turn it off. To do so, you have to open the “Actions” menu. Once you have opened such a menu, you need to go to your Preferences. The task is to click on Gesture controls and go to the General section. You will get an option to disable touch actions. Once you do so, you’re good to go with the application without worrying about the rude interruption from the touch actions.
4. Understanding The Basic Tools
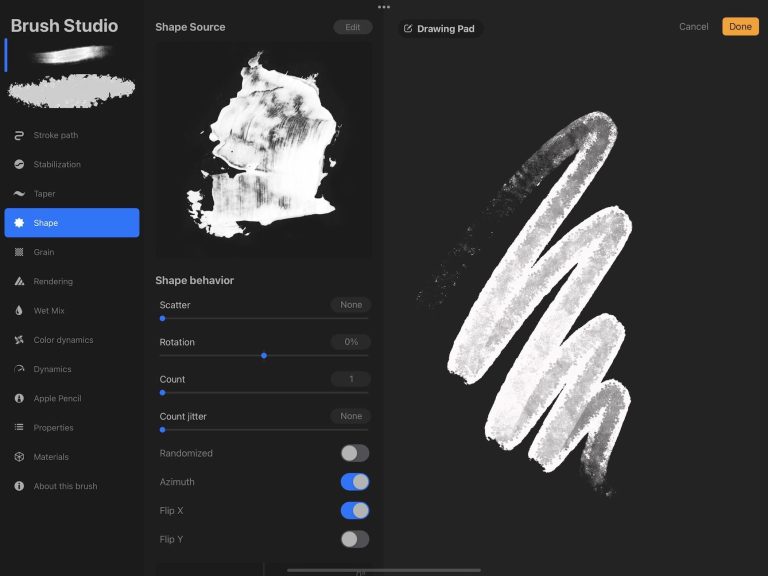
We have already talked about all the things that are must know about how to use Procreate on iPad. But if you would like to dive deep into the topic, you should know about all the basic tools that are available here. The first thing to understand is the top slider and bottom slider. The top slider is meant to alter the brush strokes and their size, while the bottom slider is used for its opacity. There is a small square right in the middle. If you would like to choose a colour from the canvas, you can utilize this small square for an eyedropper tool.
There’s an “Action” menu which is considered to be the most important part of it. When you’re drawing the canvas, this menu can help you to add and delete images, edit the size of your canvas, export your image etc. These are some of the most important options and tools to be used on the platform. There are so many other tools that you can use to make your digital arts more refined. You have to understand the basic tools. After that, you will slowly become an expert at things and start using the advanced tools too.
We have talked about some of the basics here. If you don’t know how to use Procreate on iPad as you’re new to all of it, you need to look into the above-mentioned points. We are sure that it will help you in many ways.
Benefits Of Using Procreate
Most of the people who are into digital arts have found Procreate to be a great use for their iPads. It is important to understand some of its merits. It will help you know why Procreate is considered such a useful platform. Here we go with its advantages:
- All in all, it is quite easy. If you want to learn how to make digital artworks, this is the best platform for you.
- It is quite inexpensive as well. Considering how advanced its features are, it doesn’t ask for a big price.
- No matter if you’re a beginner or you have become an expert at making digital arts, Procreate is going to be beneficial to you in both ways.
- There’s a particular animation feature on Procreate. Once you know how to use Procreate on iPad, you will slowly start understanding this animation feature in a better way. So it’s not just about the small digital artworks here. You can create all kinds of gifs and PNG images on this application.
We have already discussed how to use Procreate on iPad and all its major benefits. As far as digital artworks go, this has to be one of your best options for iPad. It is quite amazing drawing things on an iPad, especially when you have an Apple pencil to help you in the cause. If you have just started to understand digital artworks or are yet to know about them, Procreate is the perfect platform to begin your journey!